
.svg?fit=max&auto=format&n=rBROILWhBGfA_4EY&q=85&s=0185f3e9df88428c430b0b130b94d569)
What do the two modes share, and when does the toggle apply?
Modaal is an AI system for building native iOS and Android apps. You describe an idea or a task, and the AI agent generates code, builds the project, analyzes errors, and iterates with you. The quality of the result depends directly on how you phrase your request and whether you ask for a plan first. There’s a single control for that — the Plan toggle in the composer:- Plan off (the default) — the agent works directly: it writes code, builds the project, debugs, fixes, and iterates with you.
- Plan on — the agent produces a structured implementation plan (a feature spec) without writing code.
On a brand-new project you don’t touch this toggle at all. Your project’s structure is chosen in the new-project wizard before the session starts, and the first turn runs in planning mode automatically — it writes a PRD and plans the first feature. Everything below applies from your second prompt onward.
The Plan toggle
You control planning with the Plan button next to the composer. Leave it off for most work; turn it on when you want a thorough plan before any code is written.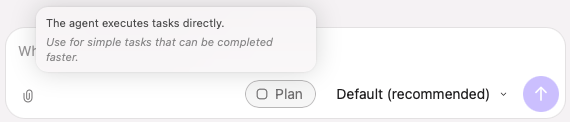
Plan off (default): the agent executes tasks directly — best for simple tasks and fast iteration.
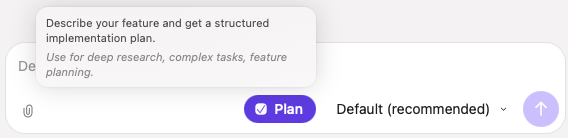
Plan on: describe your feature and get a structured implementation plan — for deep research, complex tasks, and feature planning.
The two produce different deliverables. With Plan on, the deliverable is the plan itself — a feature spec at
specs/<feature>/spec.md — and no code is written yet. With Plan off, the deliverable is working code: the agent implements your request directly. If a spec already exists from a Plan-on session, the agent reads it and builds from it.
How it fits together
Just created a project? Your first turn already ran in planning mode — you have aPRD.md and a first feature spec waiting. Leave Plan off and say “let’s build this” to start implementing.
Working on an existing project? Two typical workflows:
Structured: Plan on → Plan off → repeat
With Plan on — Planning
What it does
With Plan on, the agent produces a thorough written plan before any code is written. It:- Does not edit, create, or modify any source code
- Reads any file in the codebase for research
- Produces a single output:
spec.mdinside the feature directory - Can continue or update an existing feature spec
- A freshly created project → the Refine flow (below), which runs automatically on your first turn
- An established project → researches your codebase and writes a feature spec referencing real files and patterns to reuse
Refine: the first turn on a new project
The first prompt on a freshly created project is the Refine step, and it runs in planning mode whether or not you ever touch the toggle. You come in with an idea — anything from a single sentence to a multi-page description with Figma links — and the agent turns it into a structured project. Refine has two phases:- Phase A — Understand the idea → confirm scope if it’s ambiguous → write the PRD
- Phase B — select the first feature from the PRD → create the feature directory → write its
spec.md
- Reads your description (text, images, Figma links — whatever you provide)
- Researches the knowledge base for patterns matching your project’s architecture and platform
- Confirms scope with you if the input is ambiguous — core features vs. deferred
- Writes a structured PRD to
PRD.md - Plans the first implementable feature and writes
spec.md
Refine never asks about architecture, platforms, or devices. Those were settled by the template you picked in the new-project wizard, and the agent is told what was scaffolded. It won’t re-scaffold or second-guess the structure either.
A guitar tuner app. It listens to the microphone, detects the pitch, and shows whether the string is in tune.The agent expands this into a PRD: the main tuner screen, tuning selection (standard, drop-D, open-G), visual feedback (needle + color), session history (as a provisional suggestion). It notes that microphone access and audio analysis are core, while cloud sync is deferred. Then it writes a feature spec for the first iteration. A detailed description:
I’m building a local services marketplace. Here’s what I need: User side: Browse services by category, view provider profiles with ratings, book appointments with date/time picker, in-app chat with provider, pay via Stripe, rate after service. Provider side: Create/edit profile, manage availability calendar, accept/reject bookings, view earnings dashboard. Target: iOS 18+, iPhone only. Need to support Ukrainian and English.Here the agent preserves everything as-is, adds structure (user flows, acceptance criteria, technical considerations), and doesn’t invent extra features. Figma-based:
Here’s my Figma design: [link]. Build this app exactly as designed. The first tab is a feed, the second is search, the third is profile.The agent uses Figma MCP to pull design context and screenshots, then generates a PRD based on the UI structure. Just an attachment: You can attach a PRD, design doc, or screenshot with no text at all. The agent reads the attachment and works from its content.
Planning on an existing project
For an existing app, Plan on makes the agent research the codebase thoroughly, understand existing patterns, and produce a detailed feature spec — without writing any code. How it works:- Parse User Input — reads your feature description and checks for existing feature context
- Determine Feature Context — decides whether to continue an existing feature or create a new one:
- If the request refines/extends the current feature → updates the existing spec
- If it describes a clearly different feature → creates a new feature directory
- If ambiguous → asks you to choose
- Research the Codebase — reads source files, identifies patterns, finds reusable code, checks the knowledge base
- Write the Spec — creates or updates
spec.mdwith: Overview, User Scenarios, Technical Approach (Architecture, Key Design Decisions, Existing Code to Reuse), Implementation Steps (phased), Files to Create/Modify, Risks & Open Questions, Testing Strategy - Report Completion — summarizes findings and flags open questions
Add push notification support. Users should be able to opt in/out per category (promotions, reminders, social). Store preferences locally and sync with the backend. Show an onboarding prompt on first launch.The agent explores the existing codebase, understands the current architecture and patterns, and produces a detailed spec referencing actual files and functions to reuse. Updating an existing feature plan:
The notification spec needs to also handle silent push for background data sync. Add a section covering the background modes capability and how it integrates with the existing sync service.The agent reads the existing
spec.md, incorporates the new requirement, and overwrites with the revised version — preserving sections that are still valid.
After the plan is ready, turn Plan off to implement.
With Plan off — building directly
This is the default. The agent executes your request directly — it writes code, builds the project, and iterates with you. Use it for anything that produces code: continuous feature-building, fast prototyping, and short, specific one-off tasks. With Plan off, the agent:- Generates code, builds the project, and iterates with you
- Verifies its work (runs the project after changing Swift or Kotlin sources)
- Suggests alternatives and improvements
- Can ask you clarifying questions via structured prompts
- Commits after completing a logical unit of work (asking you first)
spec.md for context and implements from it. On its own, Plan off doesn’t write a spec — it goes straight to the code.
Working directly isn’t “sloppy.” The agent still follows the project’s architectural rules (Duet, RIBs or MVVM), uses semantic design tokens, and structures modules correctly. It just doesn’t write a formal plan before it starts.
How it works
Plan off handles two kinds of request, and the agent picks the right shape per turn:- Execute — an imperative request (“build the project”, “fix the crash in ProfileViewModel.swift:42”, “extract this into a helper”). The agent does the work, verifies it (runs the project if Swift or Kotlin sources changed), and reports what changed with file/line citations.
- Answer — a question (“why is the build failing?”, “what does this function do?”, “where is the device list populated?”). The agent reads the relevant files and answers directly, with citations — it doesn’t start editing code just to answer.
spec.md and implements from it — thorough planning followed by fast execution.
When to use it
- You’re validating an idea and want to see results fast
- You want a clickable prototype quickly
- Requirements aren’t fully clear yet — you want to iterate
- You’re implementing a feature that was already planned with Plan on
- You need a one-off action: a build, a debug session, a specific fix, a refactor
Prompts for building directly
Starting from scratch:I want to build a habit tracker. The main screen shows today’s habits as a checklist. Tapping a habit marks it done with a satisfying animation. There’s a stats screen showing streaks.The agent starts with the main screen, then adds navigation and the statistics screen. After each step — build, verify, next step. Implementing a planned feature:
Let’s implement this. Start with the notification preferences screen.The agent reads the spec from your Plan-on session, picks up the first implementation step, and starts building. Iterating on what exists:
The habit list looks too plain. Let’s add a card-based layout — each habit is a rounded card with the habit icon on the left, name in the center, and a circular progress indicator on the right.The agent understands the context (which view to change), updates the layout, builds, and shows the result. Changing direction:
Actually, let’s pivot. Instead of a checklist, make it a ring-based UI like Apple’s Activity rings. Each habit is a ring, and filling it gives visual feedback.The agent handles pivots smoothly — generates the new UI and preserves what didn’t change (models, services). Technical request:
Add CloudKit sync. When a habit is completed on one device, it should appear on other devices within a few seconds. Use CKSubscription for real-time updates.You can give precise technical instructions. The agent doesn’t simplify — it follows your level of detail. Build:
Build the project.or
Build only the watchOS target.Build debugging:
The build is failing with “Cannot find type ‘ThemeProviding’ in scope” in TunerView.swift. Fix it.Give the agent the full error. It analyzes imports, module dependencies, and suggests a fix. Runtime debugging:
The app crashes on launch. The crash log shows EXC_BAD_ACCESS in SceneDelegate.swift line 14.The agent checks crash context, runtime logs, and suggests a fix. Precise edit:
In MainView.swift, change the navigation title from “Home” to use the localized string .mainScreenTitle instead.Refactoring:
Extract the booking flow (BookingDateView, BookingConfirmView, BookingPaymentView) into a separate SPM module called BookingFeature under Libraries/.
What each mode writes to the feature directory
Turning Plan on produces a written artifact — a feature spec — that Plan off then implements:
Plan off doesn’t create a spec of its own — it builds directly. But when a spec from a Plan-on session exists, Plan off reads it and implements from it. That’s the structured workflow: plan with Plan on, build with Plan off, against the same feature directory.
How six sessions went, start to finish
Case 1. “Build Me an App” — From One Sentence to a Prototype
Situation: You have an idea and want to see results as fast as possible. No specs, no requirements — just a sentence. Approach: Refine (the first turn) → Plan off Step 1 — start the project with this in the composer, picking Quick prototype in the wizard:A meal planning app. You pick recipes for the week, and it generates a shopping list.The agent generates a PRD: weekly planner screen (calendar grid), recipe catalog (with mock data), auto-generated shopping list grouped by category. Immediately marks as deferred: backend, auth, sharing. Then it writes a feature spec for the first iteration. Step 2 (Plan off):
Let’s build this. Start with the weekly planner screen — a horizontal scroll of 7 day cards. Tapping a day opens a sheet to add recipes.Then you iterate:
The day cards are too small on iPhone SE. Make them fill the width and stack vertically instead — a scrollable list of 7 rows.
Add a “Generate Shopping List” button at the bottom of the planner. It should aggregate all ingredients from selected recipes, merge duplicates (2 onions + 1 onion = 3 onions), and group by supermarket aisle.
The shopping list looks good but needs a “check off” feature — tapping an item strikes it through.From one sentence to a working prototype — a few hours.
Case 2. Complex UI from Figma
Situation: A designer created a detailed mockup in Figma. You need to translate it to code pixel-perfect. Multiple screens, custom components, animations. Approach: Plan off (with Figma MCP)Here’s the Figma design for the onboarding flow: https://figma.com/design/abc123/Onboarding?node-id=1-2 Build all 4 onboarding screens exactly as designed. Each screen has a full-bleed illustration, title, subtitle, and a “Continue” button. The last screen has “Get Started” instead. Add a page indicator at the bottom. Swipe gesture between screens.The agent pulls design context via Figma MCP (colors, fonts, spacing, layout), generates SwiftUI views with the closest matching semantic tokens, and builds the project. Iteration:
The illustration on screen 2 is clipped at the bottom on smaller devices. Make it aspect-fit instead of aspect-fill, and add 16pt bottom padding before the title.
Add a subtle parallax effect to the illustrations — as the user swipes, the illustration on the next screen should slide in slightly faster than the text.
Case 3. Adding a Feature to an Existing App
Situation: You have a working app and want to add a complex feature. You want the agent to understand the existing code before proposing changes. Approach: Plan on → Plan off Step 1 (Plan on):Add push notification support. Users should be able to opt in/out per category (promotions, reminders, social). Store preferences locally and sync with the backend. Show an onboarding prompt on first launch.The agent researches the codebase, identifies the existing architecture and patterns, and produces a detailed
spec.md referencing actual files, functions, and modules to reuse.
Step 2 (Plan off):
Let’s implement this. Start with the notification preferences screen.The agent reads the spec it just wrote, picks up the first implementation step, and starts building.
Case 4. Technical Feature: Camera + CoreML
Situation: You need to add object detection via the camera using CoreML. This is a UIKit-heavy feature (AVCaptureSession) that integrates into a SwiftUI wrapper. Approach: Plan off, with technical detailAdd a camera scanner feature to the app. Requirements:Notice: the prompt tells the agent which architecture to use (RIBs here — in a Duet or MVVM project, name that architecture instead), which system frameworks (AVFoundation, CoreML, Vision), and where to place the code. The more technical detail you give, the more precise the result. Iteration:
- Use AVCaptureSession with the back camera, preview in a full-screen layer
- Run a CoreML model (YOLOv8 — I’ll add the .mlmodel file later, use a placeholder for now) on every nth frame
- Overlay bounding boxes on detected objects with labels and confidence scores
- In RIBs: create a ScannerRIB under Main. The interactor manages the capture session lifecycle. The view is a UIViewController with AVCaptureVideoPreviewLayer, not a SwiftUI view.
- Add a “Scan” button on the main screen that attaches the ScannerRIB.
The bounding box overlay flickers. The issue is likely that we’re updating UI on a background thread. Dispatch the overlay updates to the main queue. Also, add a confidence threshold — only show boxes with confidence > 0.7.
Case 5. “Fix My Build” — A Debug Session
Situation: After a refactoring, the project stopped building. Lots of errors, and you don’t want to dig through them yourself. Approach: Plan off (build + debug). A bug you can see on the screen rather than in the build log takes the same mode — see Debug your app by pointing at the screen. Step 1:Build the project.The agent runs the build, gets the error log, analyzes it. Step 2 (the agent responds with analysis, you provide context):
Fix all the build errors. The refactoring was moving SettingsInteractor from the Main module to a new SettingsFeature module — some imports and dependency wiring are probably broken.Context about what you refactored helps the agent understand the root cause instead of just patching symptoms. Step 3 (if there are still errors after the fix):
Build again. If there are still errors, fix them too.An iterative build-fix cycle is a normal pattern. The agent keeps context between iterations.
Case 6. Prototype Evolution: From Quick Builds to Structure
Situation: You started with Plan off, built a prototype, and it grew to 12 screens. Now you want to add a complex feature (subscription with paywall, trial period, purchase restoration) and feel you need more structure. Approach: Plan on → Plan off (or a detailed Plan-off prompt) You can turn Plan on to get a thorough spec first, or give a spec-level prompt directly with Plan off:Add a subscription system with these requirements:This is a Plan-off prompt, but with planning-level detail. The agent implements step by step, building after each step.
- Paywall screen: Shown when user tries to access premium features. Two plans: Monthly (39.99). Highlight annual as “Best Value”. Show feature comparison table.
- Purchase flow: Use StoreKit 2. Handle: successful purchase, cancelled, failed, pending (Ask to Buy). Show appropriate UI for each state.
- Trial: 7-day free trial for annual plan. Show trial badge on paywall. When trial ends, auto-convert to paid (standard StoreKit behavior).
- Restore: “Restore Purchases” button on paywall and in Settings. Verify receipt server-side (mock the server call for now, return success).
- Premium gate: Create a PremiumAccessService that checks subscription status. Inject via @Environment. Premium features: unlimited habits (free = 5), custom icons, stats export.
- Entitlement check: On launch, verify current entitlements via StoreKit 2 Transaction.currentEntitlements. Cache status locally for offline access.
How to get a better result from a prompt
Detail Level Drives the Result
All three are valid prompts. The difference is how much you control the result.
Structure Complex Requests
For features with multiple components, use numbered lists. The agent treats them as checklists — implements item by item and marks them done.Attach Files for Context
You can attach files (images, documents, PDFs) to any prompt. The agent reads and incorporates them — useful for design references (see designing with a design system, and design prompts that work for the wording that gets a usable result), PRDs from other tools, or API documentation. You can even send just an attachment with no text, and the agent will interpret it.Give Context When Debugging
Bad:“The app crashes.”Good:
“The app crashes when I tap the ‘Save’ button on the edit profile screen. Console shows: ‘Fatal error: Unexpectedly found nil while unwrapping an Optional value’ in ProfileViewModel.swift.”
Reference Specific Files
“InNaming the file, the element, and the change means the agent doesn’t have to search for any of them.BookingView.swift, the date picker is showing dates in the past. Add aminimumDateconstraint set to today.”
Pivoting Is Normal
With Plan off you can change direction at any time. The agent adapts on the spot. You don’t need to start a new project — just say:“Scrap the tab-based navigation. Let’s switch to a sidebar layout — the sidebar shows categories, and the main area shows the selected category’s content.”
Toggling Plan Is Free
Plan on and Plan off share the same project context. The agent picks up all context automatically — active feature, constitution, knowledge base.Summary: Plan on or Plan off?
Modaal uses the same knowledge base, constitution, and architectural templates either way. The difference isn’t in code quality — it’s in how much planning happens before the code gets written.